You will need to add this stylesheet to your theme
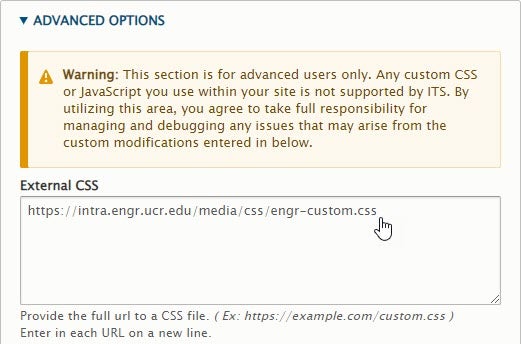
In order to use many of these elements you will need to add the engr-custom.css file to your theme.
- Navigate to Appearance -> Settings -> UC Riverside Drupal Theme CNAS or https://[sitename]/admin/appearance/settings/ucr_cnas_1
- Add https://intra.engr.ucr.edu/css/engr-custom.css to the Advanced Options External CSS box
NOTE: These styles were designed to be used with the CNAS theme and may not work as desired with other themes.
Accessing Source View
Many of the tips shown on this page will require you to edit your content in Source View. If you don't already see a source icon in your WYSIWYG editing toolbar, click the Text format dropdown beneath the Body field and select Rich Text Editor (Source).
Click the source icon and you will see the source code of your block.
Add the Ray of Light element
Option 1 - SVG
Note: Option 1 will not show in the WYSIWYG Editor or Layout Builder
add the ray-of-light-before class to any header or paragraph. You can optionally center the text as well by adding text-align-center class or using the WYSIWYG Toolbar
Centered Header
Smaller Header
Text
<h2 class="ray-of-light-before text-align-center">Centered Header</h2>
<h3 class="ray-of-light-before">Smaller Header</h2>
<p class="ray-of-light-before">Text</p>
Option 2 - Pixel Image
Download the image here, and upload it to your site. This small image is part of UCR branding. You can also download UCR's Campus Brand Toolkit if you want logos and fonts.
After you upload the image, it will appear at the top of your Media Library. Click on (View) to open it, and select everything after your root URL. Copy it to your clipboard. The portion you want to copy will always begin with /sites/. For example, its URL on this website is https://websites.engr.ucr.edu/sites/default/files/ray-light-icon.png. The part to be copied is only /sites/default/files/ray-light-icon.png. Your path to the image you upload will be similar but may not be the same. Do not use the example URLs on this page, they will not work for your site.
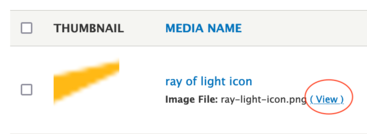
Work in the source code of your page. Add the following line of code in the source code (the code in bold red) above the words you want the image to appear on top of:
<p style="text-align:center"><img alt="" src="" /></p>
<p>The image will appear above these words</p>
Paste the portion of the image URL that you copied in between the double quotes after src=
<img alt="" src="/sites/default/files/ray-light-icon.png" />

The image will appear above these words just like you can see here!
Note you can click on the image and center it if you desire.
Custom Rules
Add Brand Blue Rule
<hr class="brand-blue" />
Add Gold Rule
<hr class="brand-gold" />
Add Green Rule
<hr class="happy-green" />
Callouts
Simple CALLOUT
You can choose any text in your page or block and place a colored block behind it.
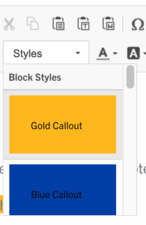
Simply select the text and choose the color you want from the Styles dropdown menu in the WYSIWYG toolbar.
Gold Callout
Brand Blue Callout
Additional colors are available
Note: Remember to adjust text color to provide appropriate contrast.
Callout Quote (advanced)
These require using Source Code View
Solid Gold bars
"If you want to be at the forefront of groundbreaking research, you've come to the right place."
- Someone with great credibility
<div class="grid-x grid-padding-x"> <div class="cell"> <div class="align-justify flex-container"> <div class="bcoe-bar callout-brand-gold"> </div> <div> <h4 class="text-align-center"> "If you want to be at the forefront of groundbreaking research, you've come to the right place." </h4> <h6 class="text-align-center"> <span style="color:#000000;"> - Someone with great credibility </span> </h6> </div> <div class="bcoe-bar callout-brand-gold"> </div> </div> </div> </div>
Solid Brand Blue bars
"If you want to be at the forefront of groundbreaking research, you've come to the right place."
- Someone with great credibility
<div class="grid-x grid-padding-x"> <div class="cell"> <div class="align-justify flex-container"> <div class="bcoe-bar callout-brand-blue"> </div> <div> <h4 class="text-align-center"> "If you want to be at the forefront of groundbreaking research, you've come to the right place." </h4> <h6 class="text-align-center"> <span style="color:#000000;"> - Someone with great credibility </span> </h6> </div> <div class="bcoe-bar callout-brand-blue"> </div> </div> </div> </div>
Solid Green bars
"If you want to be at the forefront of groundbreaking research, you've come to the right place."
- Someone with great credibility
<div class="grid-x grid-padding-x"> <div class="cell"> <div class="align-justify flex-container"> <div class="bcoe-bar callout-happy-green"> </div> <div> <h4 class="text-align-center"> "If you want to be at the forefront of groundbreaking research, you've come to the right place." </h4> <h6 class="text-align-center"> <span style="color:#000000;"> - Someone with great credibility </span> </h6> </div> <div class="bcoe-bar callout-happy-green"> </div> </div> </div> </div>
Gradient Gold bars
When editing these bars there is a different style for the left and for the right.
Note: You will not see the gradient color bars in the WYSIWYG Editor or layout Builder but they will be applied once the page is saved.
"If you want to be at the forefront of groundbreaking research, you've come to the right place."
- Someone with great credibility
<div class="grid-x grid-padding-x"> <div class="cell"> <div class="align-justify flex-container"> <div class="bcoe-bar brand-gold-gradient-bar-left"> </div> <div> <h4 class="text-align-center"> "If you want to be at the forefront of groundbreaking research, you've come to the right place." </h4> <h6 class="text-align-center"> <span style="color:#000000;"> - Someone with great credibility </span> </h6> </div> <div class="bcoe-bar brand-gold-gradient-bar-right"> </div> </div> </div> </div>
Gradient Brand Blue bars
"If you want to be at the forefront of groundbreaking research, you've come to the right place."
- Someone with great credibility
<div class="grid-x grid-padding-x"> <div class="cell"> <div class="align-justify flex-container"> <div class="bcoe-bar brand-blue-gradient-bar-left"> </div> <div> <h4 class="text-align-center"> "If you want to be at the forefront of groundbreaking research, you've come to the right place." </h4> <h6 class="text-align-center"> <span style="color:#000000;"> - Someone with great credibility </span> </h6> </div> <div class="bcoe-bar brand-blue-gradient-bar-right"> </div> </div> </div> </div>
Gradient Green bars
"If you want to be at the forefront of groundbreaking research, you've come to the right place."
- Someone with great credibility
<div class="grid-x grid-padding-x"> <div class="cell"> <div class="align-justify flex-container"> <div class="bcoe-bar happy-green-gradient-bar-left"> </div> <div> <h4 class="text-align-center"> "If you want to be at the forefront of groundbreaking research, you've come to the right place." </h4> <h6 class="text-align-center"> <span style="color:#000000;"> - Someone with great credibility </span> </h6> </div> <div class="bcoe-bar happy-green-gradient-bar-right"> </div> </div> </div> </div>
Backgrounds
Grey Stripped
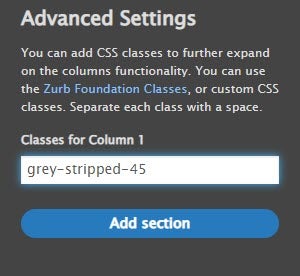
This background is created by adding the grey-stripped-45 class in the layout builder
Blue Waves
This background is created by adding the blue-waves class in the layout builder
Dont forget to change your text color
Gold Waves
This background is created by adding the yellow-waves class in the layout builder
Don't forget to change your text color
Additional Gradient Options
Blue Gradient
This background is created by adding the blue-gradient class in the layout builder
Green Gradient
This background is created by adding the green-gradient class in the layout builder
Yellow Gradient
This background is created by adding the yellow-gradient class in the layout builder
Info Card Options
Align Info card buttons to the bottom
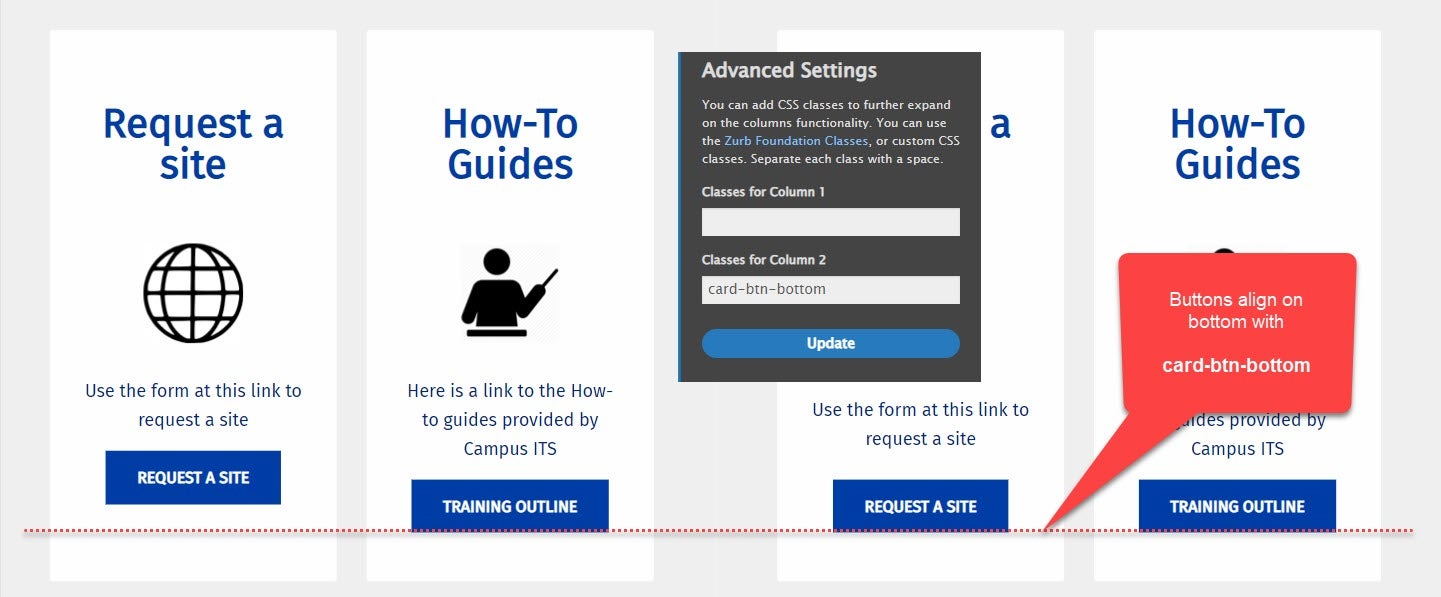
Add the card-btn-bottom class in the Layout builder Advanced section. To ensure that the buttons are aligned the button must be the last item in the Body section. make sure to remove any trailing spaces or characters
Helper Classes
Add the following classes to Layout Builder Advanced Settings to automatically adjust the text color without having to modify the blocks

| Black | White |
|---|---|
| To make the Headers black add header-black |
To make the Headers white add header-white |
| To make the text black add text-black |
To make the text white add text-white |
Logos Grid
To create an evenly spaced grid of logos

- Add all of your images using the Media Browser

- Apply the WYSIWYG Scale - 225px Image Style
- Wrap them all with the following Div structure using the Source Code View
<div class="grid-x grid-margin-x grid-logos"> <drupal-entity embed-display-settings="{"image_style":"scale_225","image_link":""}" ...></drupal-entity> <drupal-entity embed-display-settings="{"image_style":"scale_225","image_link":""}" ...></drupal-entity> <drupal-entity embed-display-settings="{"image_style":"scale_225","image_link":""}" ...></drupal-entity> ... </div>
Scroll to Top Icon
This is best used on single page web designs. It provides a transparent icon fixed in the bottom right of the page that, when clicked, will smooth scroll to the top of the page.
<div>
  <a class="top-link hide" href="" id="js-top">
    <svg viewbox="0 0 12 6" xmlns="http://www.w3.org/2000/svg"><path d="M12 6H0l6-6z"></path></svg>
    <span class="screen-reader-text">Back to top</span>
  </a>
</div>

<script src="https://intra.engr.ucr.edu/js/bcoe-scroll-to-top.js"></script>